In this tutorial, we will show you how to use Linear Layout to design for XML layout. This able to help you to design your layout more systematic. Besides that, we will show you how the "weight" works.
There are 3 options you can use to design your XML Linear Layout: horizontal, vertical and mix up both together. We will show these one by one for you to let you have a better understanding on it.
1. Linear Layout (Horizontal)
Now go to File>New>XML>XML Layout File to create a new XML layout. A window shown as Figure 6.1 will pop-out and please ensure you are selecting LinearLayout as the Root Tag. Then put the desired name you want in the Layout File Name column.
 | |||||
| Figure 6.1 |
Click on the Finish button, therefore you are successfully create a new LinearLayout file in your project and can start coding at there (Figure 6.2).
<?xml version="1.0" encoding="utf-8"?>
<LinearLayout xmlns:android="http://schemas.android.com/apk/res/android"
android:layout_width="match_parent"
android:layout_height="match_parent">
</LinearLayout>
<LinearLayout xmlns:android="http://schemas.android.com/apk/res/android"
android:layout_width="match_parent"
android:layout_height="match_parent">
</LinearLayout>
Figure 6.2
In order to create a horizontal linear layout, you need to add a line command android:orientation="horizontal" in the <LinearLayout > tag. Now create three textview in the XML layout and change the display text as "First", "Second" and "Third" respectively and notice that how they are arranged. We should able to get the XML layout as Figure 6.3.
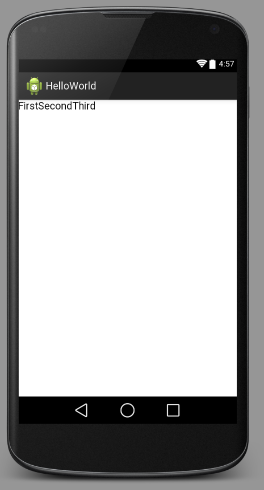 |
| Figure 6.3 |
In Figure 6.3, we saw that the three words are arranged in horizontal and stick together with each other. Now we can set the layout weight of each component by using android:layout_weight command.
For example, we set three of the component's layout weight equal to one. The XML layout output shown as Figure 6.4. Each of the components are occupied the same space in horizontal.
 |
| Figure 6.4 |
You can try to change the value of the layout weight of the component and observe what will be happen. The overall code for the above is shown as Figure 6.5.
<?xml version="1.0" encoding="utf-8"?>
<LinearLayout xmlns:android="http://schemas.android.com/apk/res/android"
android:layout_width="match_parent"
android:layout_height="match_parent"
android:orientation="horizontal" >
<TextView
android:layout_width="wrap_content"
android:layout_height="wrap_content"
android:textAppearance="?android:attr/textAppearanceMedium"
android:text="First"
android:id="@+id/tvName"
android:layout_weight="1" />
<TextView
android:layout_width="wrap_content"
android:layout_height="wrap_content"
android:textAppearance="?android:attr/textAppearanceMedium"
android:text="Second"
android:id="@+id/tvAge"
android:layout_weight="1"/>
<TextView
android:layout_width="wrap_content"
android:layout_height="wrap_content"
android:textAppearance="?android:attr/textAppearanceMedium"
android:text="Third"
android:id="@+id/textView3"
android:layout_weight="1"/>
</LinearLayout>
Figure 6.5
2. Linear Layout (Vertical)
For this stage is very easy. We just change the line command of android:orientation="horizontal" to android:orientation="vertical", then we will able see the change of XML layout become as Figure 6.6.
 |
| Figure 6.6 |
3. Linear Layout (Horizontal and Vertical)
Now we will show you how to combine the horizontal and vertical linear layout. First, we need to create nested LinearLayout as shown at below.
<?xml version="1.0" encoding="utf-8"?>
<LinearLayout xmlns:android="http://schemas.android.com/apk/res/android"
android:layout_width="match_parent"
android:layout_height="match_parent"
android:orientation="vertical" >
<LinearLayout
android:layout_width="match_parent"
android:layout_height="wrap_content"
android:orientation="horizontal" >
...........................................
...........................................
</LinearLayout>
<LinearLayout
android:layout_width="wrap_content"
android:layout_height="match_parent"
android:orientation="vertical">
...........................................
...........................................
</LinearLayout>
</LinearLayout>
There are two <LinearLayout /> tags in another <LinearLayout /> tag. That mean, the outer LinearLayout tag is main component and the another two LinearLayout tags are sub-component of it.
Now we can set one of the sub-components' android:orientation="horizontal", while another to android:orientation="vertical". Thus, the XML layout output will behave as Figure 6.7.
 |
| Figure 6.7 |
Hopefully, after we went through this tutorial, you able to manipulate the arrangement of components in LinearLayout well. In next tutorial, we will discuss on RelativeLayout which is quite similar with this tutorial.
No comments:
Post a Comment